Some websites, such as online banking, booking systems and work tools, need pop-up windows to work properly. Chrome blocks pop-ups by default. Here’s how to allow them for one site or for all sites.
Tip: allowing pop-ups only for the sites you trust is safer than allowing them everywhere.
Method 1: Allow pop-ups for one site (quickest)
- Open the website that needs pop-ups.
- When Chrome blocks a pop-up, a small pop-up blocked icon appears at the right end of the address bar. Click it.
- Choose Always allow pop-ups and redirects from [site] and click Done.
- Reload the page.
Method 2: Change the setting for all sites
1. Open Chrome settings
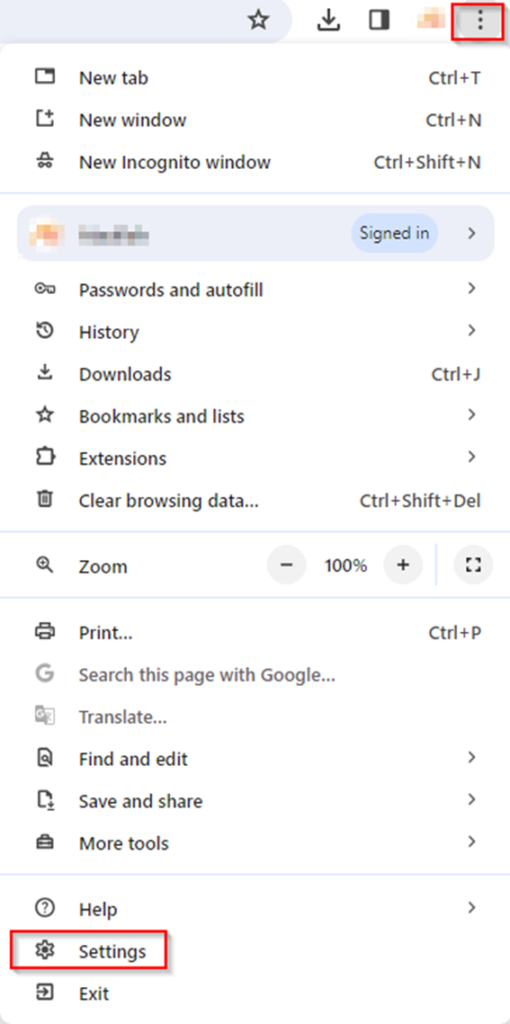
Click the three-dot menu in the top-right corner of Chrome and select Settings.
2. Go to Site settings
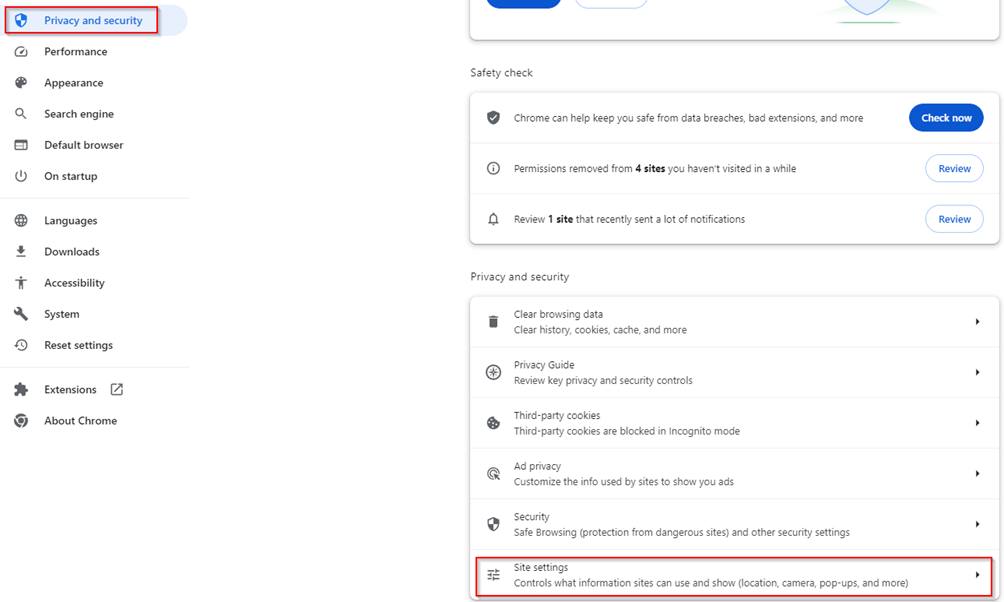
Click Privacy and security in the left sidebar, then Site settings.
3. Open Pop-ups and redirects
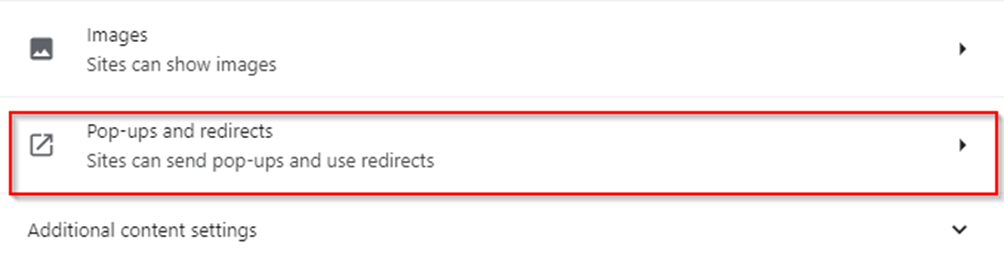
Scroll down to the Content section and click Pop-ups and redirects.
4. Choose the default behaviour
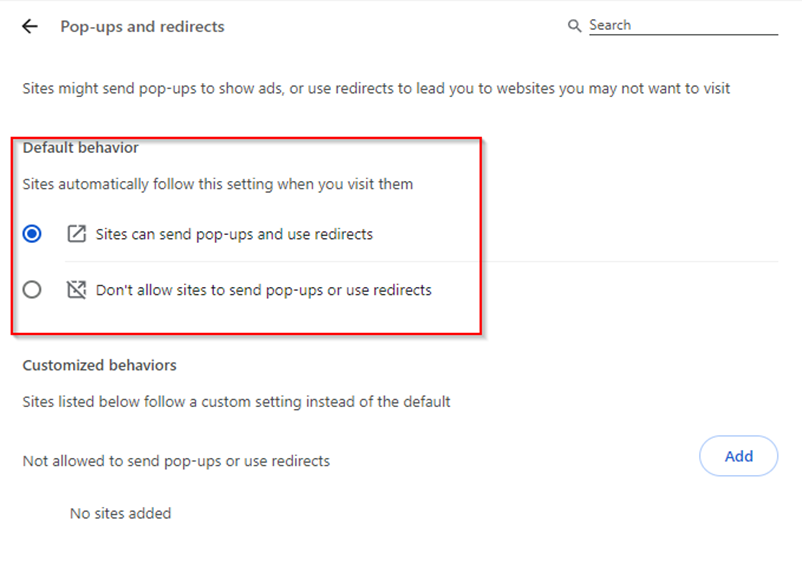
Select Sites can send pop-ups and use redirects. To allow only certain sites instead, keep pop-ups blocked and use Add next to Allowed to send pop-ups and use redirects to enter the site’s address.
Still blocked? Check these
- Ad blockers and privacy extensions can block pop-ups too. Pause the extension for that site.
- Work or school computers: if you see “Managed by your organization”, the setting may be locked by your IT department’s policy.
- Chrome on Android or iPhone: open Chrome’s menu, then Settings → Site settings (Android) or Settings → Content settings (iPhone), and change Pop-ups and redirects or Block pop-ups.
Share this content:
